Most people are of the notion that if you are launching an e-commerce website, you must do it the hard way. And then if you are a first-time entrepreneur, figuring out how to start may get pretty overwhelming.
Nothing to worry!
Today, we have plenty of open source PHP platforms on the World Wide Web (like WordPress, Magento, Joomla, etc.) that can make things easy for you. Shopify is one such platform built purely for e-commerce websites.
Shopify
Undoubtedly, the easiest way of opening an e-commerce website is by using Shopify.
Launched in 2004, Shopify began as an online store in itself (used to sell snowboarding gears), but now it serves as a platform for hosting more than 500,000 merchants from 175+ countries.
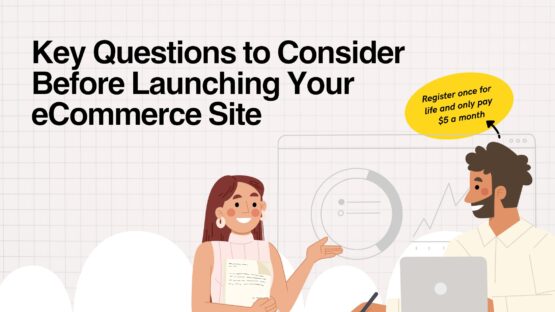
The platform offers a fourteen-day trial for every store you wish to open. So giving it a try will cost you absolutely nothing. During that period you can also experiment with shop designs, inventory selection, plugins, payment processors, and various other aspects of the site.
Once your trial is over, you would have to pay $29, $79 or $299 per month, depending on the features you use. The basic plan starting at $29/month is more than suitable for beginner entrepreneurs.
How To Launch A Store On Shopify
- Pick a name
Picking a name is important but do not dwell much on it.
Start with something very random and simple. For example, if you are opening a women’s jewelry shop, think of something like Sparkle Jewelry, Glam Jewelry, etc.
We would recommend you to add the word “store” to the name because you will have to find an available domain name. And it is easier to find a relevant one to your business when you have the word “store” attached to the name.
- Now go to Shopify and create an account
Previously, you had to get yourself a server, upload your e-commerce system, hire an expert to customize it as per your requirements and pay for maintenance. The entire process was expensive and time-consuming.
Thankfully, Shopify has simplified the entire process such that even a non-technical person can perform the job in a jiffy.
Just go to Shopify, click on “start your free trial,” enter the name of your store, and create your shop.
- Setting up
When you are signing up for an account on Shopify, the system will ask you to enter the name of your store, and soon afterward, it will assign you a website address, something like “abc.myshopify.com.”
Fortunately, setting up your personal domain name is fairly routine.
After entering the name of your shop, the system will ask you a few questions related to the type of shop you are going to open, followed by a few more personal details. Soon, you will be on the dashboard page.
Just click on the “Add Domain” button and then, you may either buy a new one from Shopify or follow the on-screen instructions to connect the one you already have.
- Fine tune settings
Add your PayPal address under the payments section. Later, you may remove, change, or add additional payment options as per your liking.
If you have no PayPal account, register on PayPal. It will hardly take around 5 minutes.
Shopify also offers a handy tool for generating privacy policy, terms and conditions, and return policy. You can gain access to the tool by following the steps below:
- Go to Shopify settings and locate “Checkout.”
- Scroll down to “Refund” and then go to “Privacy.”
- You will then notice a TOS statements section to generate the sample of each policy.
- Work on the looks
One of the most important steps of opening a virtual store is to figure out how you would like it to look.
You may do this by clicking on the “Customize Theme” button from the dashboard itself. Also, click on the “Explore free themes” button to check out your available options as a part of your Shopify package.
Some of the available themes also come with two or more skin options which you will see after opening up the popup window describing the same. If you do not see anything of your choice, you may go to the “Visit Theme Store” and purchase one to your liking.
- Setting-up products
No matter how good your online store looks, it would not do you much good if you don’t have your products displayed.
To set up products, click on the “products” link on the left-side menu, followed by the “Add product” option. This will take you to a separate page where you can enter product images, title, variants, shipping weight, and various other details.
You may also add a “Compare At” option next to the prices on your site, letting your customers know that they are getting the item for less than the maximum retail price.
- Adding pages
While your Shopify website will automatically add each product to its own page, you may want some additional pages for things like contact forms, shipping information, FAQs and likewise.
Just click on the “Online Store” option in the side menu, choose “Pages,” and click on the “Add page” option. You can enter the details on the next page.
Note: If you want a contact form, make sure you select the “page.contact” option from the menu to your right.
- Adding blogs
Adding blogs to your website is equally straightforward.
Go to the “Online Store” option to your left, click on “Blog posts,” followed by “Create blog post.” After you enter your post, make sure you click the “Visible” option to your right.
You should also copy the first paragraph of your write-up and paste it into the “Excerpt” area.
Once the blog’s created, you may even add it to your homepage. Just go to “Online Store,” followed by the blue “Customize” button to your right. Then click on the “Add section” link to your left and select “Blog Post.”
So that more or less sums things up. Hope you had a great read.